
So, you’re ready to dive into the world of Azure Kubernetes and harness the power of container orchestration on Microsoft Azure. But where do you start? Fear not, because in this guide, we’ll walk you through the process of setting up Azure Kubernetes step by step.
- Sign in to the Azure portal.
- On the Azure portal home page, select Create a resource.
- In the Categories section, select Containers > Azure Kubernetes Service (AKS).
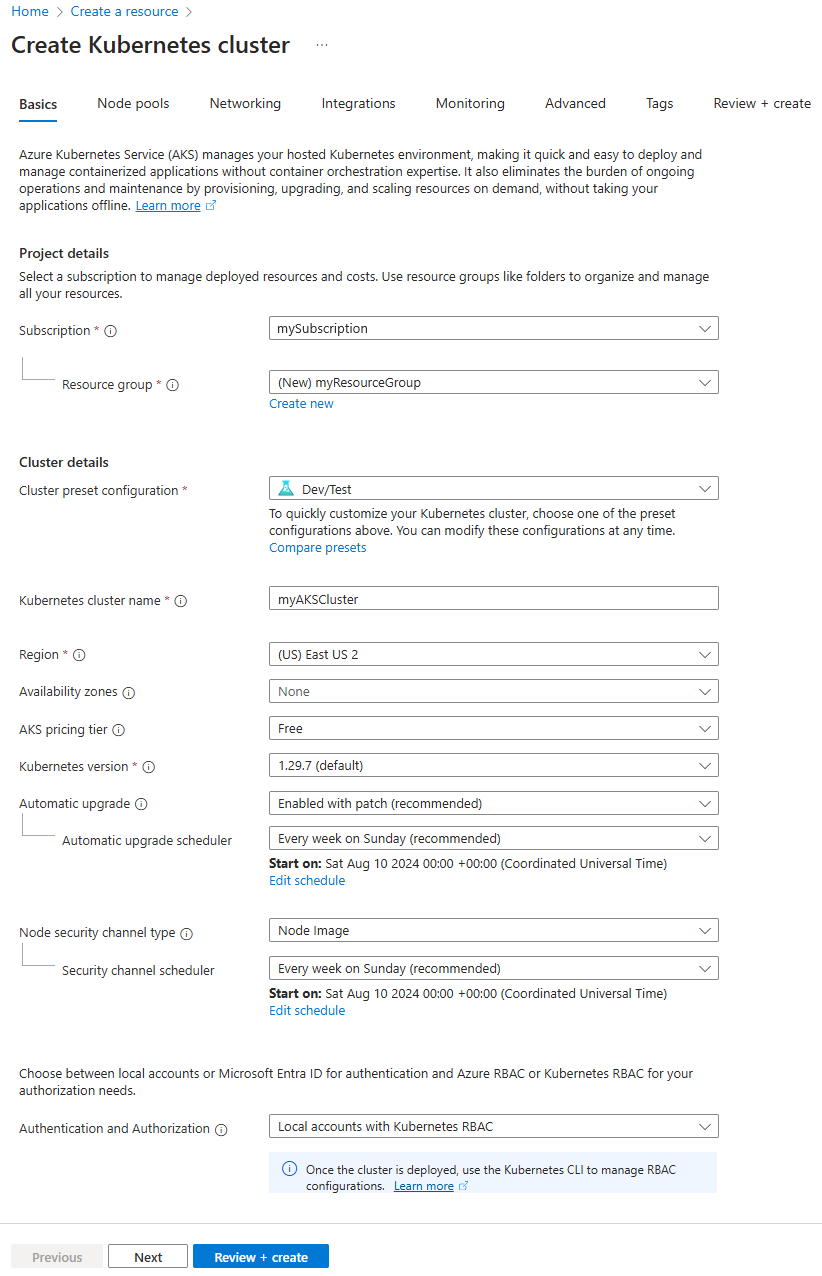
- On the Basics tab, configure the following options:
- Under Project details:
- Select an Azure Subscription.
- Create an Azure Resource group, such as myResourceGroup. While you can select an existing resource group, for testing or evaluation purposes, we recommend creating a resource group to temporarily host these resources and avoid impacting your production or development workloads.
- Under Cluster details:
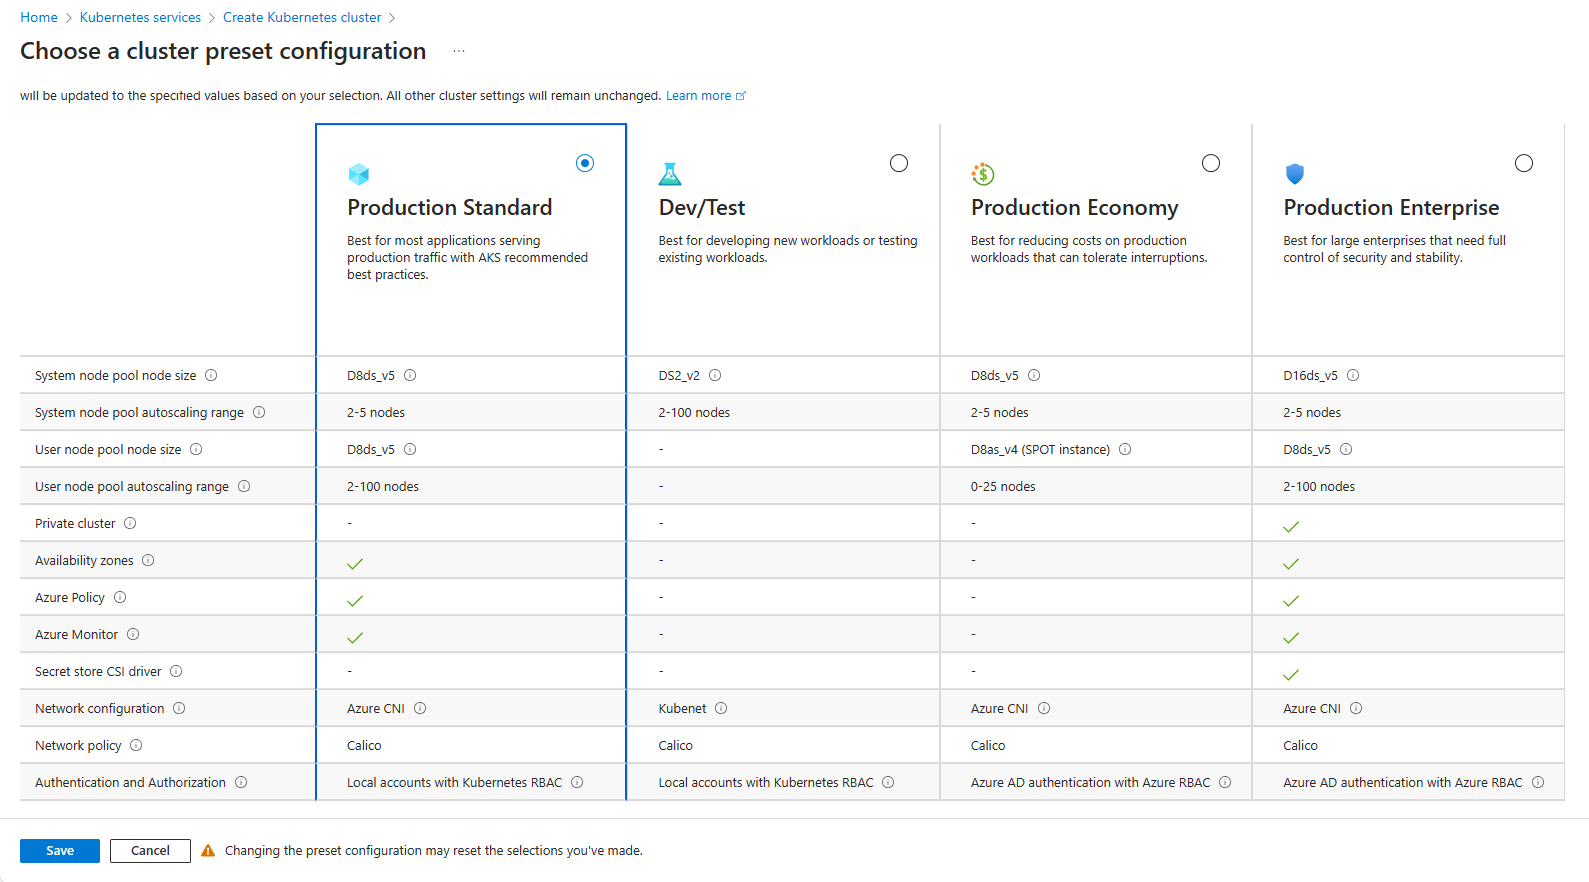
- Set the Cluster preset configuration to Dev/Test. For more details on preset configurations, see Cluster configuration presets in the Azure portal.
Note: You can change the preset configuration when creating your cluster by selecting Compare presets and choosing a different option.

- Enter a Kubernetes cluster name, such as myAKSCluster.
- Select a Region for the AKS cluster.
- Set the Availability zones setting to None.
- Set the AKS pricing tier to Free.
- Leave the default value selected for Kubernetes version.
- Leave the Automatic upgrade setting set to the recommended value, which is Enabled with patch.
- Leave the Authentication and authorization setting set to Local accounts with Kubernetes RBAC.

- Select Next. On the Node pools tab, add a new node pool:
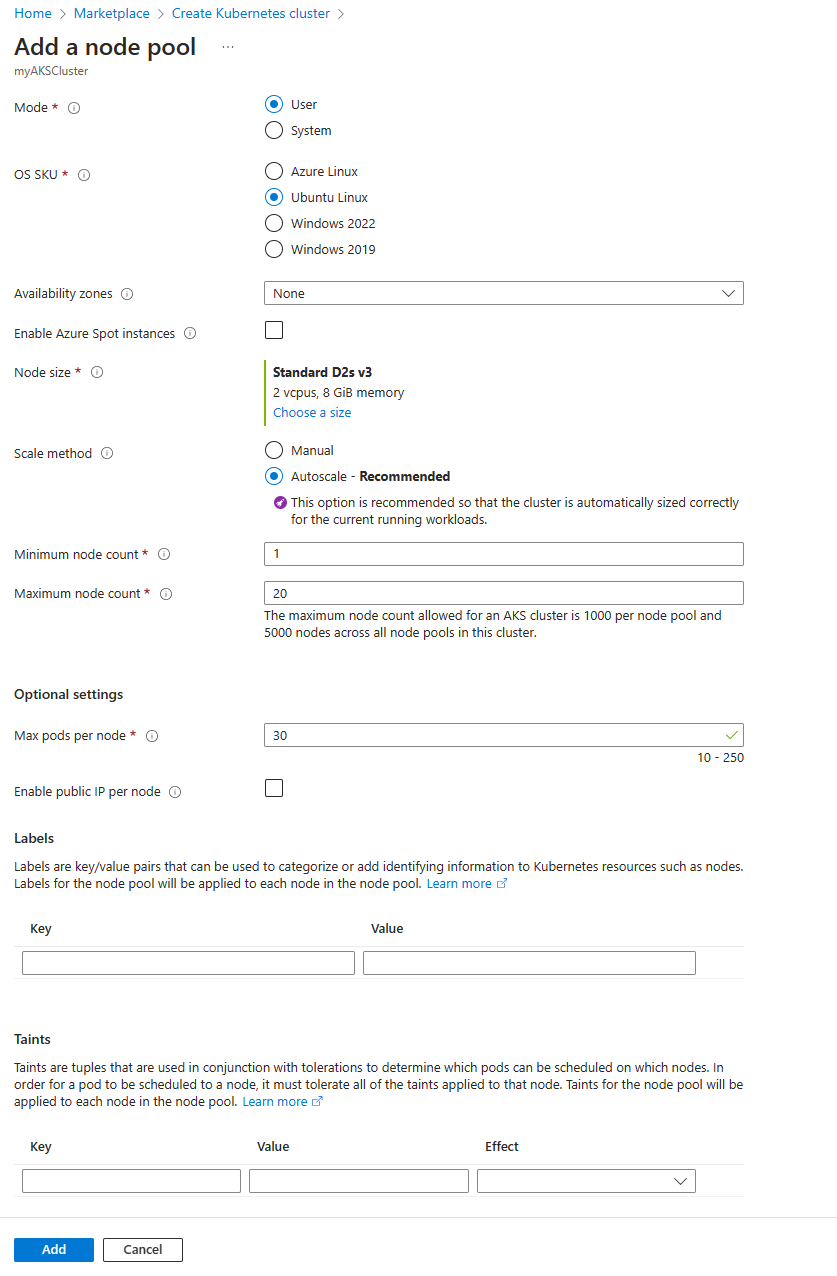
- Select Add node pool.
- Enter a Node pool name, such as nplinux.
- For Mode, select User.
- For OS SKU, select Ubuntu Linux.
- Set the Availability zones setting to None.
- Leave the Enable Azure Spot instances checkbox unchecked.
- For Node size, select Choose a size. On the Select a VM size page, select D2s_v3, then choose the Select button.
- Leave the Scale method setting set to Autoscale.
- Leave the Minimum node count and Maximum node count fields set to their default settings.

- Leave all settings on the other tabs set to their defaults, except for the settings on the Monitoring tab. By default, the Azure Monitor features Container insights, Azure Monitor managed service for Prometheus, and Azure Managed Grafana are enabled. You can save costs by disabling them.
- Select Review + create to run validation on the cluster configuration. After validation completes, select Create to create the AKS cluster.
It takes a few minutes to create the AKS cluster. When your deployment is complete, navigate to your resource by either:
- Selecting Go to resource, or
- Browsing to the AKS cluster resource group and selecting the AKS resource. In this example you browse for myResourceGroup and select the resource myAKSCluster.
- Monitor and Manage AKS
- Utilize Azure Monitor and other monitoring tools to monitor the performance and health of your AKS cluster. You can also manage your cluster using Azure CLI or the Azure portal.
Conclusion
Setting up Azure Kubernetes doesn’t have to be daunting. By following these steps, you can quickly deploy your AKS cluster and start leveraging the power of container orchestration on Microsoft Azure. Whether you’re a seasoned Kubernetes pro or just getting started, Azure Kubernetes offers a robust platform for deploying and managing your containerized applications with ease.

Leave a Reply